SpringBoot的WEB开发之Hello-World

创建基本的web应用

SpringBoot可以快速的创建一个restful的web应用。下面开始从零开始创建一套基本的web应用。

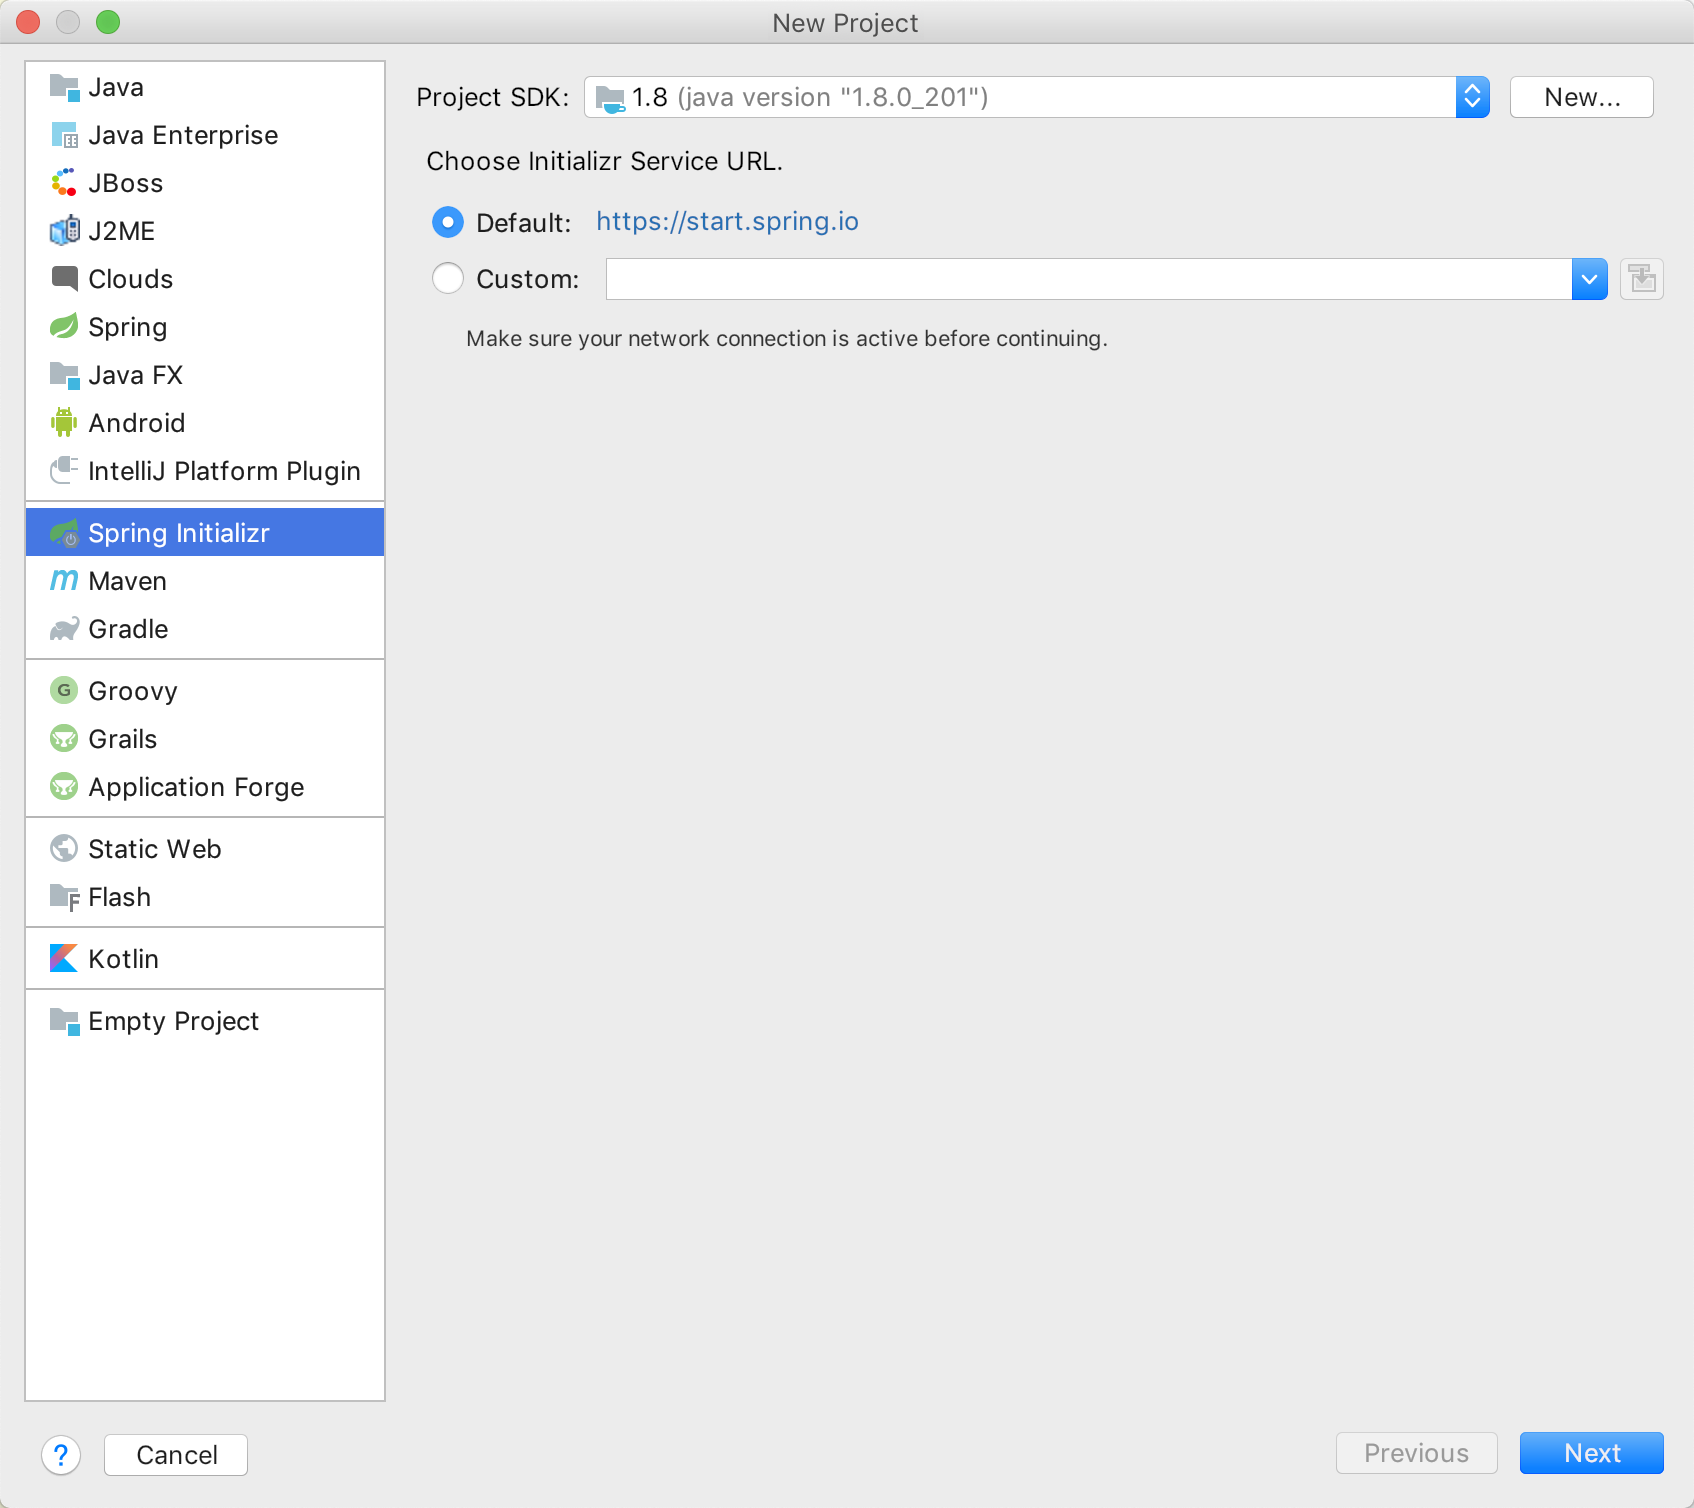
使用idea创建Spring initializr

我这里直接使用idea中的Spring initializr 来创建SpringBoot应用。同理可以使用start.spring.io中。创建完成后直接在IDE中导入即可。

  1. 需要在idea中新建项目

新建项目

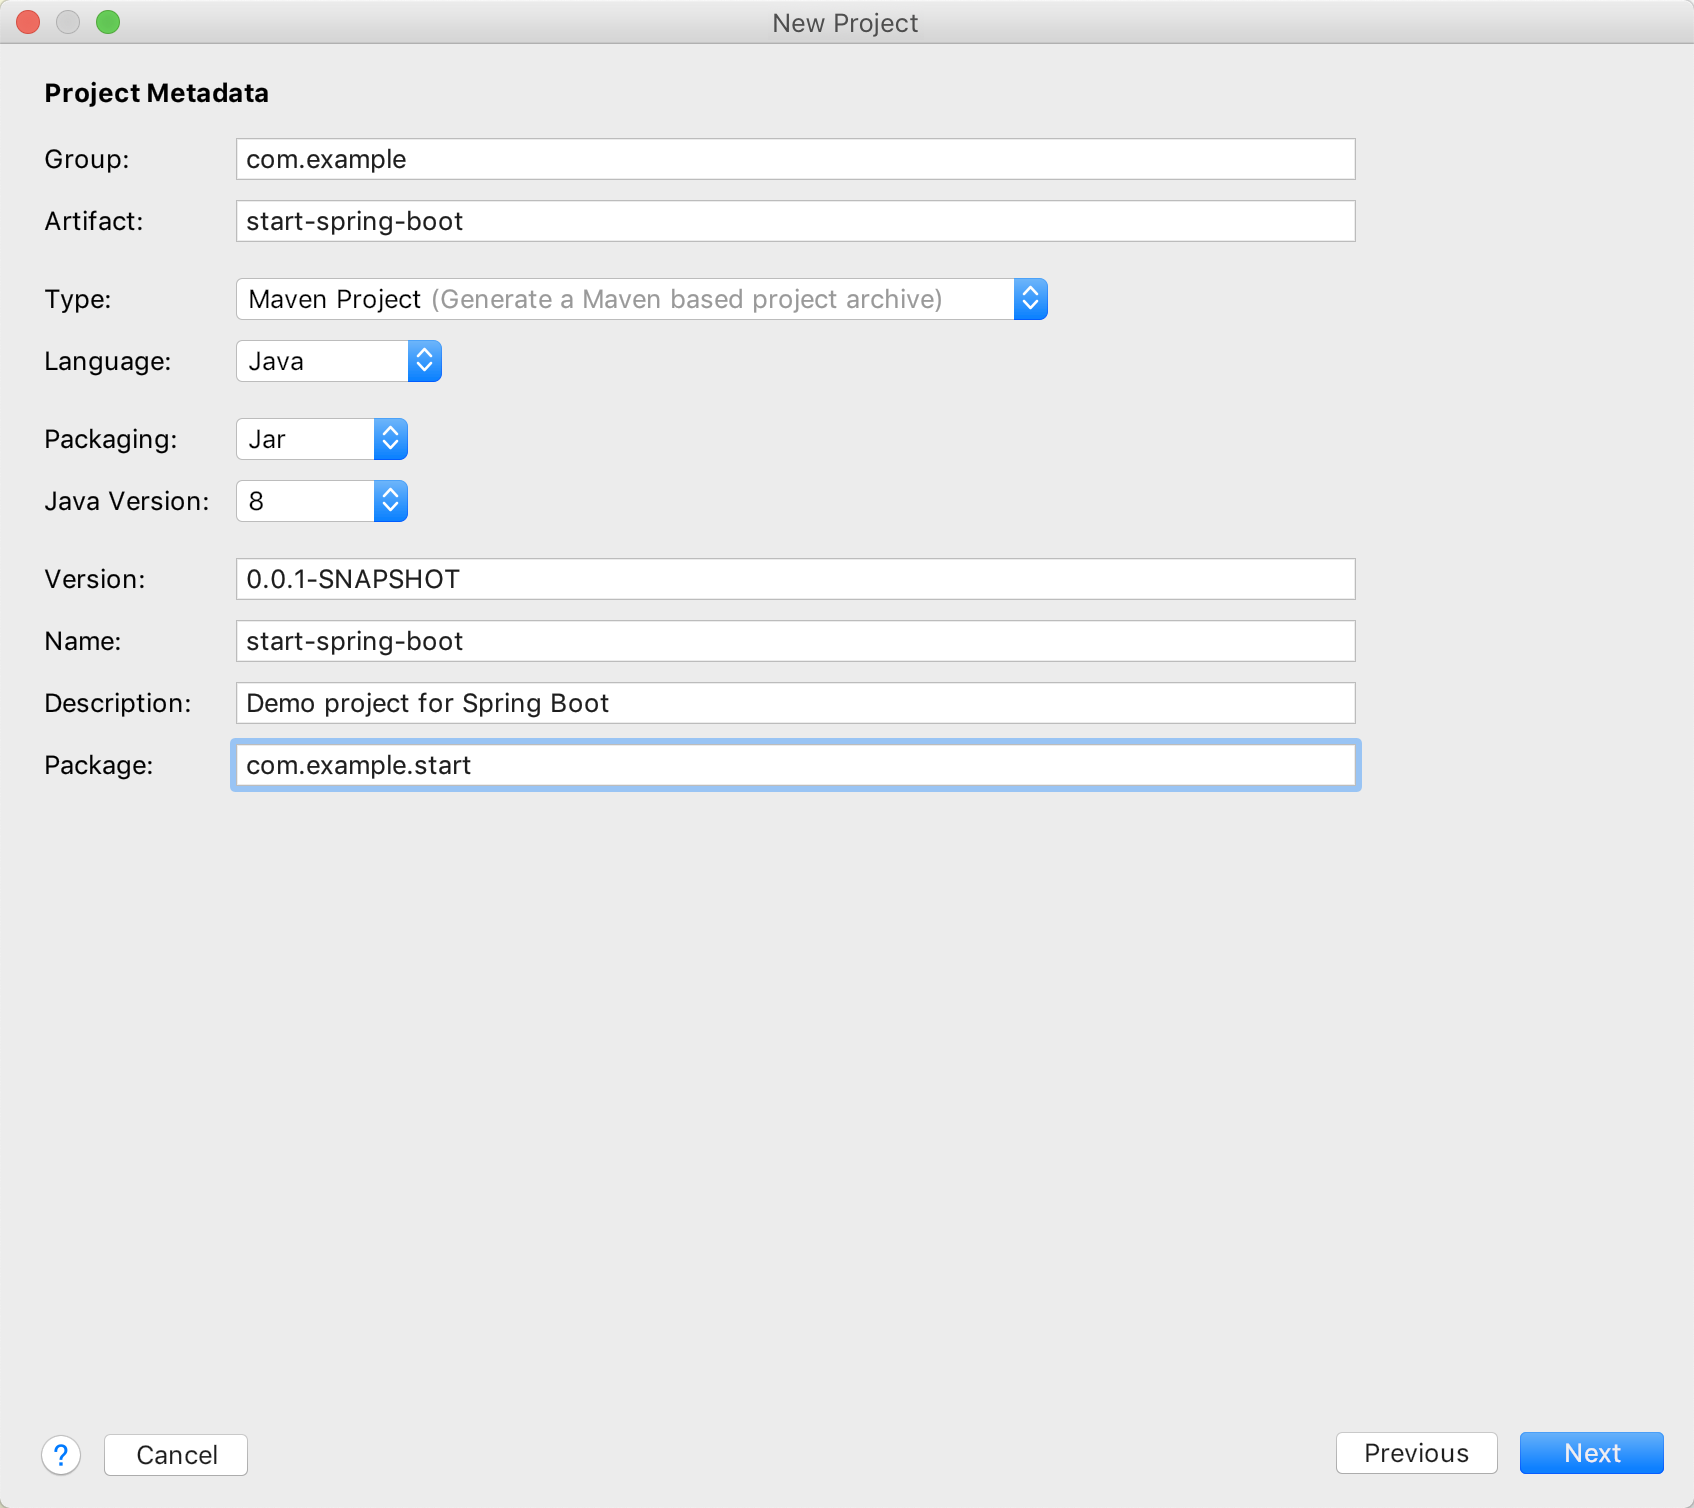
  1. 填写项目的基本信息

基本信息

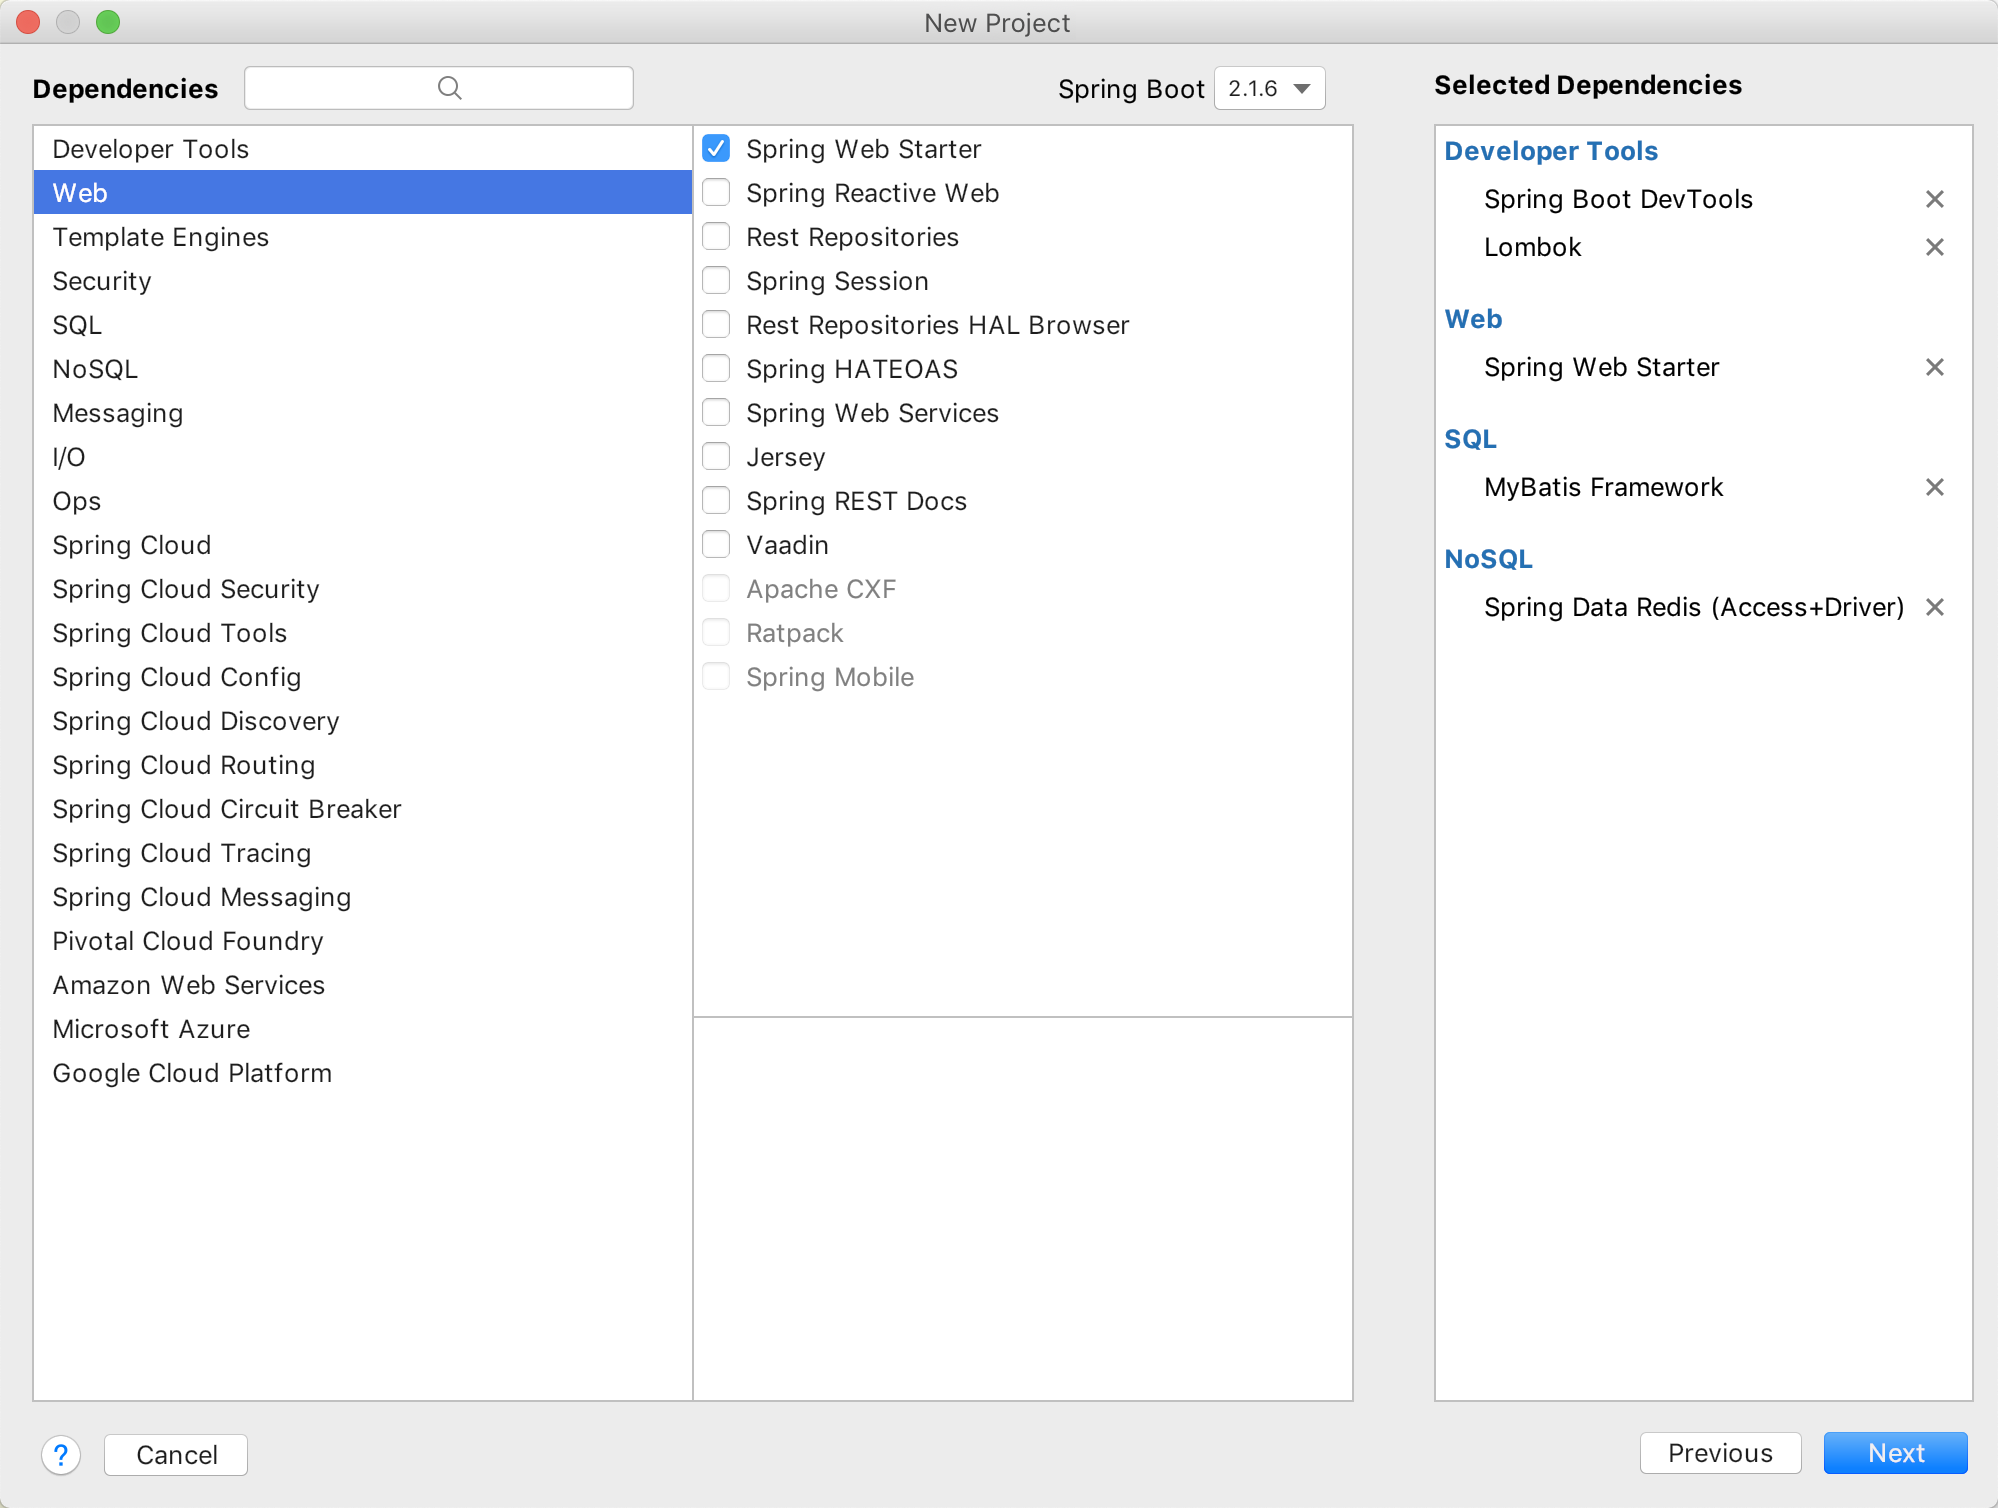
  1. 勾选需要的依赖

勾选依赖

  1. 最后点击finish完成创建。

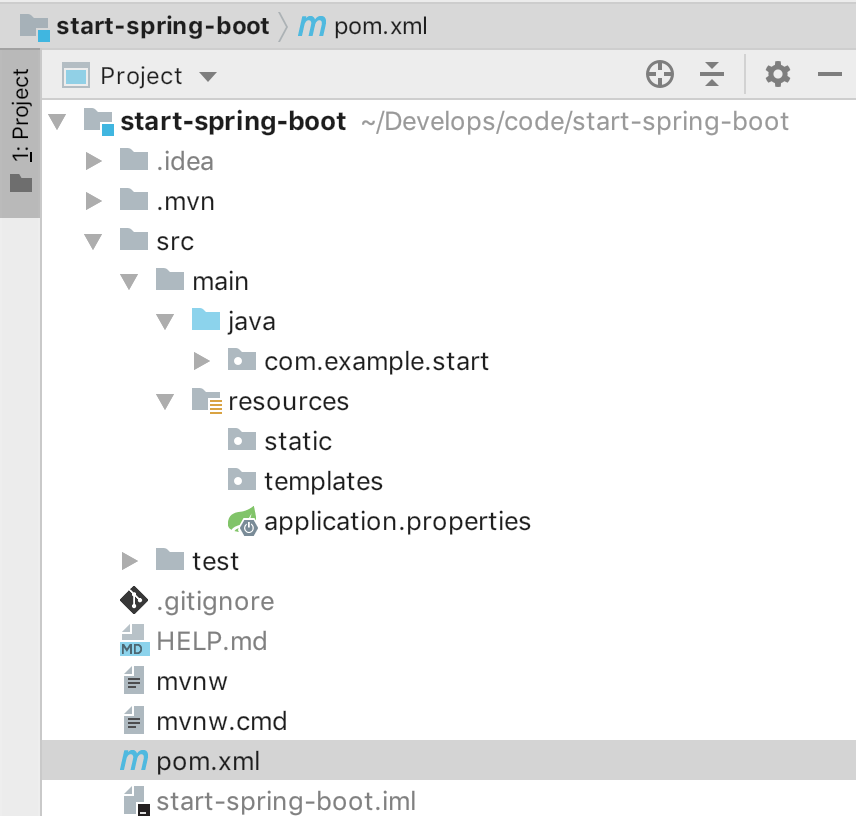
文档结构说明

新建SpringBoot应用后自动创建的目录结构如如上图,其中SpringBoot启动类StartSpringBootApplication放在java/com/example/start文件夹中,用于启动整个项目。

对于资源文件,SpringBoot给出来一套目录标准。

resource文件夹中的application.properteis为整体的SpringBoot配置文件。其中有static和templates目录。

  • static 文件夹用于存放静态资源,如js,css
  • templates 文件夹用于存放模版文件,如jsp,html

那么SpringBoot是如何建立这些目录文件标准的呢?

web目录相关的自动配置

web目录相关的自动配置是在WebMvcAutoConfiguration自动配置类中进行配置。而对资源的加载使用的是addResourceHandler 方法

1
2
3
4
5
6
7
8
9
10
11
12
13
14
15
16
17
18
19
20
21
22
23
24
25
26
27
28
29
@Override
public void addResourceHandlers(ResourceHandlerRegistry registry) {
// 是否启用默认资源处理
if (!this.resourceProperties.isAddMappings()) {
logger.debug("Default resource handling disabled");
return;
}
// 获取资源处理程序所服务资源的缓存周期
Duration cachePeriod = this.resourceProperties.getCache().getPeriod();
CacheControl cacheControl = this.resourceProperties.getCache().getCachecontrol().toHttpCacheControl();
// 如果映射器还未映射到/webjars/** 则进行如下操作
if (!registry.hasMappingForPattern("/webjars/**")) {
// 添加对/webjars/** 的资源映射
customizeResourceHandlerRegistration(registry.addResourceHandler("/webjars/**")
.addResourceLocations("classpath:/META-INF/resources/webjars/")
// 加载包下的 /META-INF/resources/webjars/ 下的内容
.setCachePeriod(getSeconds(cachePeriod)).setCacheControl(cacheControl));
}
// 静态路径pattern 为 "/**"
String staticPathPattern = this.mvcProperties.getStaticPathPattern();
if (!registry.hasMappingForPattern(staticPathPattern)) {
//如果映射器还没有映射 /** 路径的资源时
customizeResourceHandlerRegistration(registry.addResourceHandler(staticPathPattern)
// 加载所有的默认定义的位置里的资源。
.addResourceLocations(getResourceLocations(this.resourceProperties.getStaticLocations()))
.setCachePeriod(getSeconds(cache
Period)).setCacheControl(cacheControl));
}
}

webjars

WebJars是打包到JAR(Java Archive)文件中的客户端Web库(例如jQuery和Bootstrap)。

from webjars官网

根据以上内容举个例子来讲解如何使用webjars进行静态资源的加载:

  1. 去官网找相关资源的依赖

依赖

  1. 添加到pom.xml文件中

webjar

以粉色的竖线为分割线,左侧为下载完的webjars的jar包,右侧为在pom.xml文件中的依赖信息。

加载webjars

如果SpringBoot发现有webjar的应用jar包,则加载路径classpath:/META-INF/resources/webjars/下的文件。在图中例子中就是jquery文件夹下的所有内容。这样SpringBoot就能够识别jquery包下的所有静态文件了。

映射webjars

SpringBoot会将所有已将加载jars映射到 /webjars/** 这个路径上。

比如上面我们添加了jquery.min.js。我们启动程序,可以在http://localhost:8080/webjars/jquery/3.4.1/jquery.min.js这个地址上访问,发现系统已经通过webjars将资源加载到了。在实际的使用中,使用script标签引用webjars也是引用这个地址的静态文件。

项目内静态资源

使用webjars用来加载静态资源非常方便,但是如果自己写的js和css等静态资源也需要加载时,就需要放到SpringBoot默认加载的目录下。

1
2
3
4
5
6
7
8
9
10
11
12
@ConfigurationProperties(prefix = "spring.resources", ignoreUnknownFields = false)
public class ResourceProperties {
private static final String[] CLASSPATH_RESOURCE_LOCATIONS = { "classpath:/META-INF/resources/",
"classpath:/resources/", "classpath:/static/", "classpath:/public/" };
private String[] staticLocations = CLASSPATH_RESOURCE_LOCATIONS;
private boolean addMappings = true;
private final Chain chain = new Chain();
private final Cache cache = new Cache();
// 获取静态资源目录
public String[] getStaticLocations() {
return this.staticLocations;
}

通过getStaticLocations获取静态资源的目录,默认的SpringBoot定义了classpath下的以下的文件,都可以放置静态文件,都可以通过url的方式访问到这个静态文件。

  • classpath:/META-INF/resources
  • classpath:/resources/
  • classpath:/static/
  • classpath:/public/

需要注意的是这个classpath就是一开始创建SpringBoot应用帮我们创建好的resource路径

这个类也是一个xxxxProperties类,所以可以通过改变相应的配置文件中的属性来改变这个路径。这里的路径使用的变量是staticLocations,所以相应的在application.properties文件中可以使用spring.resources.staticLocations=路径名称就行了。

主页的设置

SpringBoot默认的使用静态资源文件夹下的index.html作为首页。

1
2
3
4
5
6
7
8
9
private Optional<Resource> getWelcomePage() {
String[] locations = getResourceLocations(this.resourceProperties.getStaticLocations());
//遍历每个locations寻找index.html页面作为首页
return Arrays.stream(locations).map(this::getIndexHtml).filter(this::isReadable).findFirst();
}

private Resource getIndexHtml(String location) {
return this.resourceLoader.getResource(location + "index.html");
}

如果找到主页的index.html后,就开始做主页的映射操作

1
2
3
4
5
6
7
8
9
10
11
12
13
@Bean
public WelcomePageHandlerMapping welcomePageHandlerMapping(ApplicationContext applicationContext) {
return new WelcomePageHandlerMapping(new TemplateAvailabilityProviders(applicationContext),
applicationContext, getWelcomePage(), this.mvcProperties.getStaticPathPattern());
}

WelcomePageHandlerMapping(TemplateAvailabilityProviders templateAvailabilityProviders,
ApplicationContext applicationContext, Optional<Resource> welcomePage, String staticPathPattern) {
// 如果存在,设置首页为index.html 映射路径为: /**
if (welcomePage.isPresent() && "/**".equals(staticPathPattern)) {
logger.info("Adding welcome page: " + welcomePage.get());
setRootViewName("forward:index.html");
}

上面是依据SpringBoot加载静态资源的方式做的简单总结。

添加controller

在上一步创建完项目后,可以紧跟着写一个SpringMVC测试的controller,看看能否启动项目。

1
2
3
4
5
6
7
8
9
10
// 起到了@Controller和@Responsebody两种作用,实际上就是
// 两种注解的整合
@RestController
public class HelloController {

@RequestMapping("/hello")
public String hello(){
return "hello world";
}
}

如果你也像我勾选来数据库相关的starters,在启动时,控制台会提示需要配置数据库的基本配置。

那么怎么找这些配置呢?

  1. 去官网找配置
  2. 直接看代码

如果你没有碰到上面这个问题,那么请忽略以下部分。

因为前几篇文章中已经分析来SpringBoot是如何完成自动配置的,所以这里我想通过找代码的方式直接看它能够配置哪些属性。

  1. 首先在autoconfiguration包下面的spring.factory中搜索jdbc
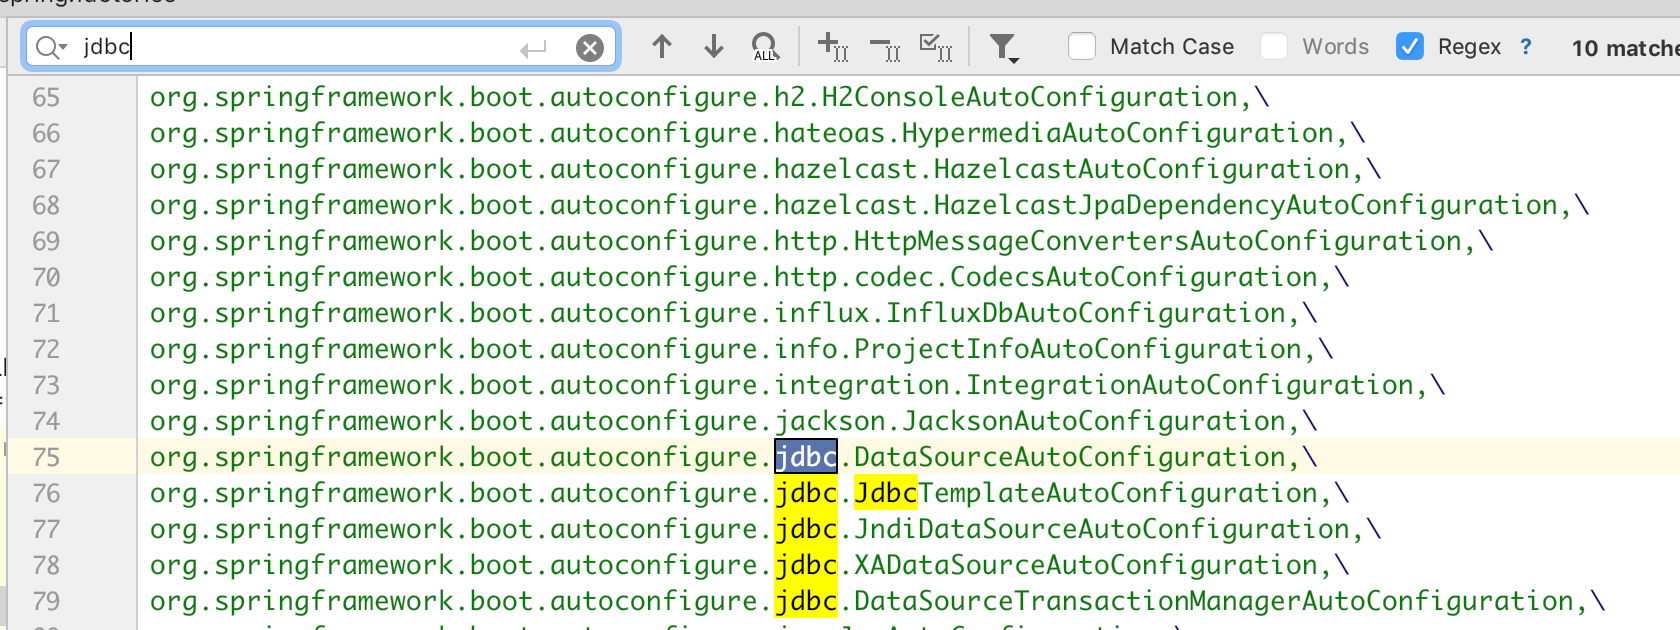
jdbc

  1. 点击关于DataSource的自动配置类
1
2
3
4
5
6
7
8
9
10
11
12
13
14
15
16
17
18
19
@EnableConfigurationProperties(DataSourceProperties.class)
@Import({ DataSourcePoolMetadataProvidersConfiguration.class, DataSourceInitializationConfiguration.class })
public class DataSourceAutoConfiguration {

// 使用DataSourceProperties类作为属性类,以下为基本属性

@ConfigurationProperties(prefix = "spring.datasource")
public class DataSourceProperties implements BeanClassLoaderAware, InitializingBean {

private ClassLoader classLoader;

private String name;
private boolean generateUniqueName;
private Class<? extends DataSource> type;

private String driverClassName;
private String url;
private String username;
private String password;

根据DataSourceProperties类,可以知道如果我们像配置DataSource,那么有这几个属性可以进行配置。

1
2
3
4
5
# spring.datasource 为前缀,后面为属性名,和Properties类中的属性相对应。
spring.datasource.url=jdbc:mysql://localhost:3306/springboot
spring.datasource.driverClassName=com.mysql.jdbc.Driver
spring.datasource.username=root
spring.datasource.password=123456

测试结果

结果

-------------本文结束感谢您的阅读-------------

本文标题:SpringBoot的WEB开发之Hello-World

文章作者:NanYin

发布时间:2019年07月13日 - 12:07

最后更新:2019年08月12日 - 13:08

原始链接:https://nanyiniu.github.io/2019/07/13/2019-07-13-SpringBoot%E7%9A%84WEB%E5%BC%80%E5%8F%91/

许可协议: 署名-非商业性使用-禁止演绎 4.0 国际 转载请保留原文链接及作者。